No products in the cart.
How To
How to Evenly Space Wall Decals in a Pattern
21
May
May
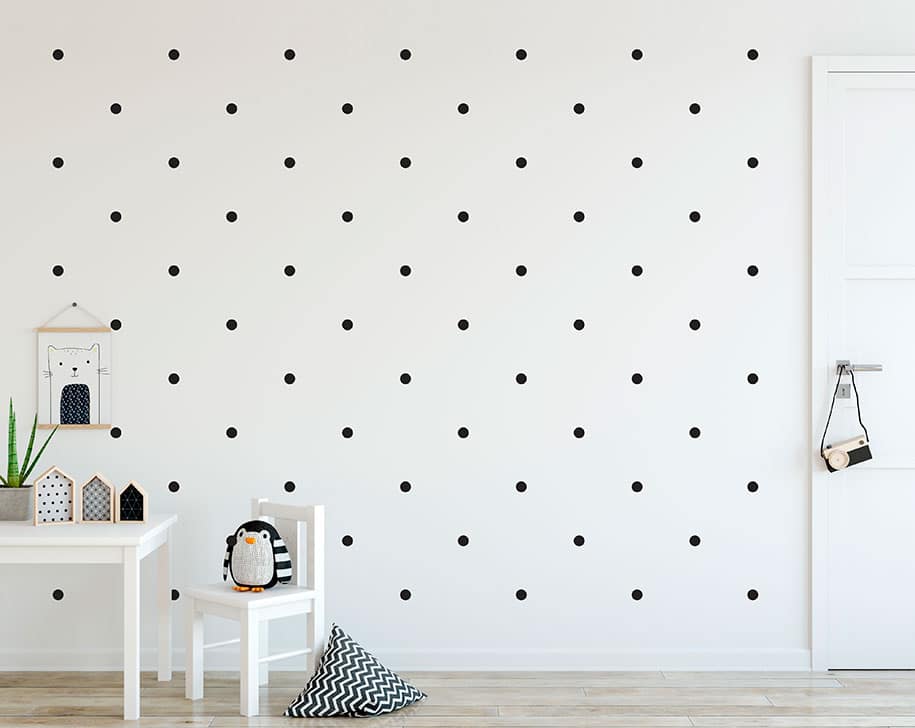
One of the most common questions we get asked is how to evenly space wall decals in a pattern? Creating a feature wall in your nursery by placing decals in an even pattern is super trendy as it gives the look and feel of wallpaper without the messy work. Having even spacing is critical to a good look result, before you start sticking decals down, we recommend following this simple tutorial on how to evenly space wall decals in a pattern. This method works the same regardless if you are using polka dot decals or any other design for your pattern.
Measure up
First of all you need to measure both the hight and width of your wall. Most standard walls are either 2.4m or 2.7m tall. In this example our wall size is 2.4m high x 3m wide and we are using polka dot wall decals. Decide how much spacing you want between the decals, spacing them further apart will make a pack go further and will be cheaper, you also don’t want them too close together as this will look too busy. Anywhere from 30cm – 60cm is a good range but it really is all down to personal taste. Now divide your wall into columns and rows to create a grid using that spacing dimension. We are using 6 rows and 7 columns, this means our grid sections will be 40cm x 42.8cm. Its a good idea to draw a diagram of your grid either on paper or electronically to have a visual of what your wall will look like. This will also enable you to count how many decals you will need to purchase, in our example we will need 72 decals.
Mark it out
Now you need to transfer that grid onto your wall, there are a couple of ways of doing this and we have listed two with our favourite being option one.
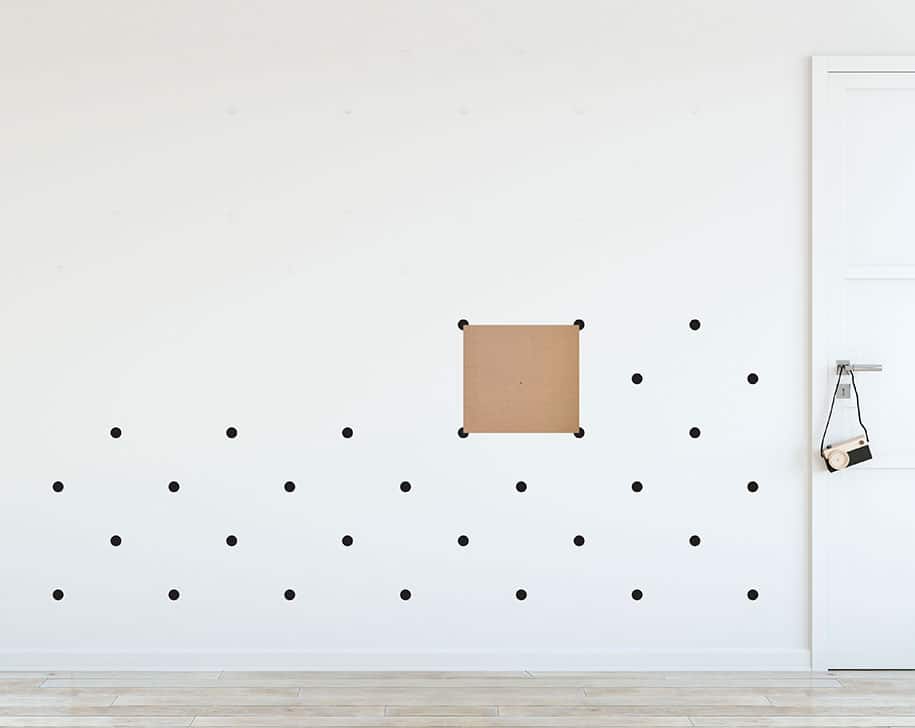
1 – Cardboard template
Make a template from a piece of cardboard or paper that is size of one of your grid sections. Make a hole in the middle of the cardboard, the centre and corner points will be where the decals will go. If your grid fits perfectly into your wall dimensions, you will be starting from one corner of the wall with the template.
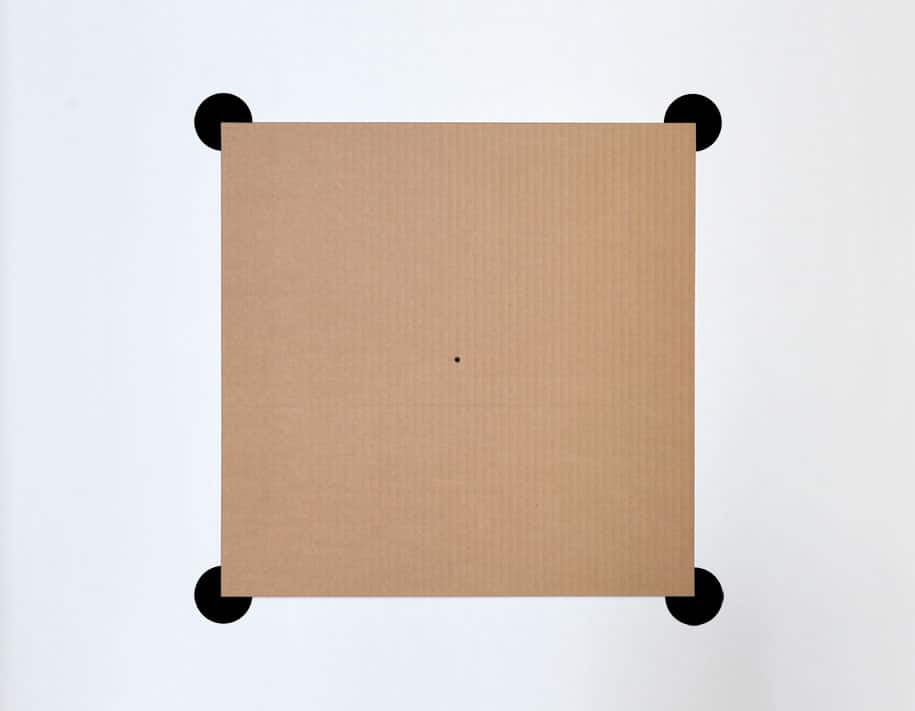
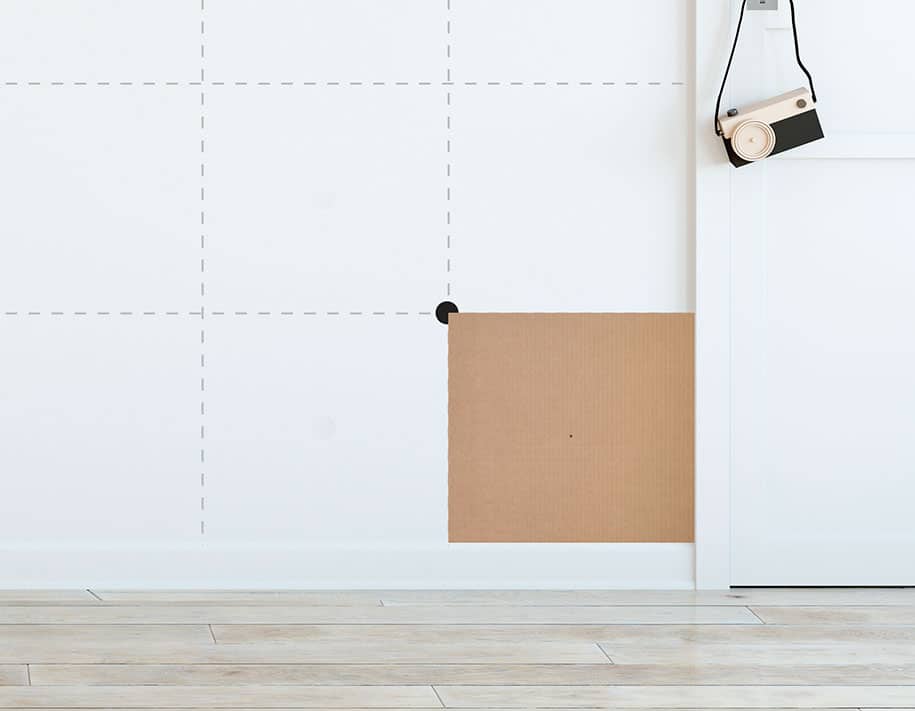
Lightly mark the corner and centre points with a pencil. Now move the template around your wall moving from corner to corner, mark all the centre and corner points. If you don’t want to mark your wall, you can skip marking and just apply the decals directly as you go. Always make sure the template is level as you move it around and place the corners in the same spot or in the centre of the decals you have already applied.
Note: If you divided your wall evenly into rows and column, your grid sections might not be square; like ours of 50cm x 48cm, this is fine and we are happy with this look. Alternatively, if you want a square grid such as 40cm x 40cm, your grid might not fit perfectly into your wall dimensions (in our case 40cm doesn’t divide evenly into 3m). Then you will need to give a border for your grid by starting with your template slightly in from the edges or start from the centre of your wall and work outwards. See images for further explanation.
2 – Tape measure and lines.
As an alternative to using a cardboard template you could mark out row lines for your grid using a string line, blue painters tape or a laser level. Then use a tape measure and pencil to mark out the spacing between each decal to make the columns for your grid.
Pattern examples
The pattern you create is totally up to you! There are unlimited combinations of colour, size, spacing and design to choose from. Here are a few images to get you inspired.

Get creative
Uniform patterns are great, but you can also add interest by breaking the pattern and mixing colours and designs. You could alternate the colour of every other decal, alternate colours by row, or use a random placement of different colours. Our small pack qualities make it easy to purchase multiple colours. Just as you can mix up the colours, you can also mix up the decal designs. Combine different designs like; clouds with polka dots, arrows with plus signs or cactus with teepees. Our tribal wall decals are a mixed design pack and can save you a few dollars.
It’s unlikely your feature wall will use the exact amount of decals that you have purchased, but don’t throw them out! Use any left over decals to accent other areas in your room.
Find all of our wall decals here. Designed and made in Australia. When applying decals, make sure to follow the instructions from our article on how to apply wall decals.
All the best with creating your feature wall! Please snap and picture and share on Instagram @41orchard #41orchard.
This was soooo helpful!
Thank you